Categories
PHP Wordpress

Load / Enqueue the latest version of css and javascript files

Add the following code to your functions.php file to load or enqueue the most recent child theme style.css file or any css/javascript file.

function my_custom_files() {

  //use the current date and time as the file version
  $cache_buster = date("YmdHi");
  
  wp_register_style( 'childstyle', get_stylesheet_directory_uri() . '/style.css', $cache_buster, 'all'  );
  wp_enqueue_script( 'my-scripts', get_stylesheet_directory_uri() . '/scripts.js', array(), $cache_buster, true );
  wp_enqueue_style( 'childstyle' );

}
add_action( 'wp_enqueue_scripts', 'my_custom_files', 11);
Categories
Blog Code Snippets PHP Wordpress

Add a new widget area to a WordPress theme

If you are familiar with WordPress themes then you know that a lot of themes have a widgetized sidebar. This means that you can add, remove, and re-order widgets on your WordPress website by using the “widget” section of your WordPress dashboard.

Having a widgetized sidebar is very useful, but you may want to widgetize other parts of your WordPress theme as well. This is very easy to do, and once your theme is modified it will be simple for you, or the WordPress administrator, to swap widgets in and out of different parts of the website.

Step 1: Add code to theme
The first step is to add the following line of code to the part of your theme that you want to widgetize. Be sure to change “Name of Widgetized Area” to a name that makes sense for you. You will need to do this with a code editor and then upload the file via a FTP client.

<?php
if ( is_active_sidebar( 'custom-header-widget' ) ) : ?>
    <div id="header-widget-area" class="chw-widget-area widget-area" role="complementary">
    <?php dynamic_sidebar( 'custom-header-widget' ); ?>
    </div>
    
<?php endif; ?>

Step 2: Edit functions.php
In your WordPress theme folder, there should be a functions.php file. If there isn’t, just make a new file and name it “functions.php”.

In the functions.php file, add the following code:

function wpb_widgets_init() {
    register_sidebar( array(
        'name'          => 'Custom Header Widget Area',
        'id'            => 'custom-header-widget',
        'before_widget' => '<div class="chw-widget">',
        'after_widget'  => '</div>',
        'before_title'  => '<h2 class="chw-title">',
        'after_title'   => '</h2>',
    ) );
}
add_action( 'widgets_init', 'wpb_widgets_init' );

The code above should be wrapped in PHP open and close(<?php and ?>, respectively) tags. If you already have a functions.php file those tags will already be there. If you created one yourself you will have to add them.

Make sure to change the name of the function (in this case it is “Name of Widgetized Area”) so that it matches the name you gave it in step 1.

The ‘before_widget’ and ‘after_widget’ parameters allow you to specify what code you would like to put before and after each widget. In this case I put a div with an class for styling purposes.

The ‘before_title’ and ‘after_title’ parameters allow you to wrap the widget titles in code. In this case I wrapped the title in <h3> and </h3> tags respectively.

Step 3: Adding Widgets
Once you have successfully added the widgetized area, you can start adding widgets to your WordPress site. To do this, log into your WordPress dashboard, then click on Widgets in the Appearance dropdown on the left side.

You should now see the “Name of Widgetized Area” section on the right side of your screen.

Now just click and drag widgets into the box just like your sidebar!

Categories
Code Snippets Wordpress

Customize any Form on WordPress using CSS

Have you installed a contact form plugin for WordPress and found the default layout is entirely boring?

I’ve been there! The default layout comes with a very little or absolutely no css formatting.

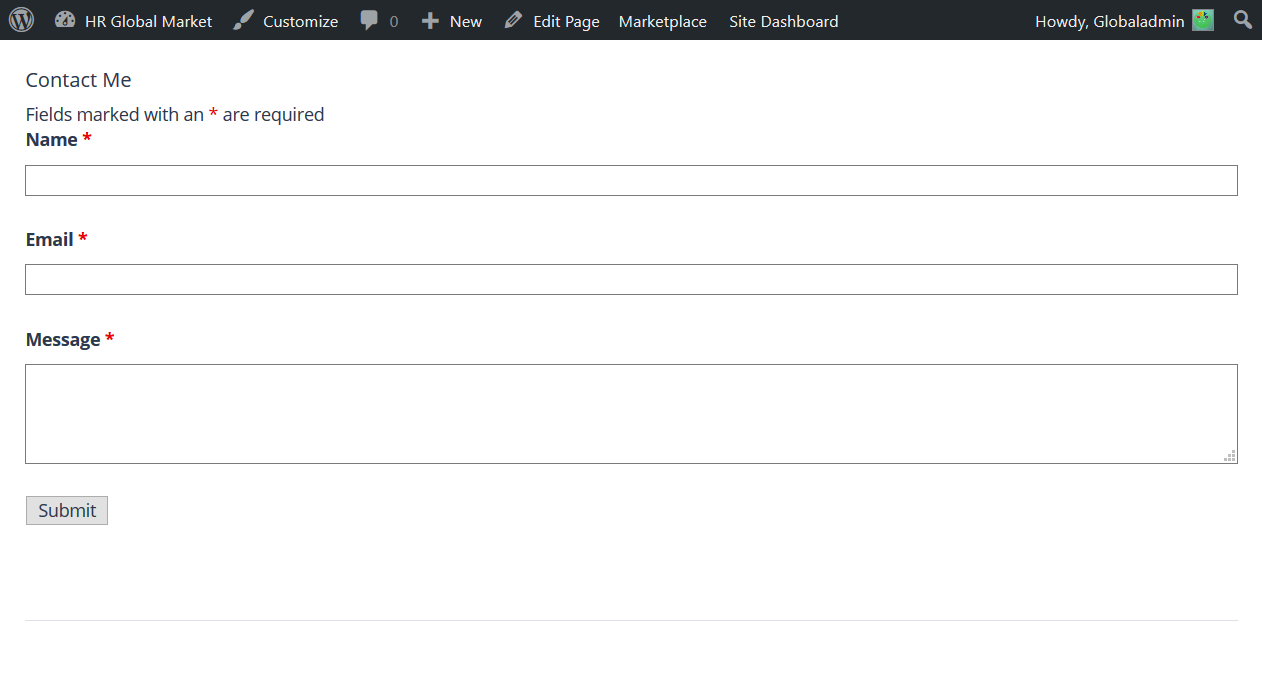
Below is the default layout for Ninja Forms.

Contact Form - Before Applying CSS

Luckily, I was able to write a snippet of code which will resolve that.

The Solution to Customizing any Form on WordPress using CSS

This snippet can work on any contact form for WordPress; including of course Contact Form 7 and Ninja Forms. Just copy and paste into your custom css editor. Some themes will come up with this editor which you can find in the WordPress Admin section under ‘Appearance’. If your theme doesn’t come with it, download and install Simple CSS and JS which will work perfectly well.

input, select, textarea {
  border-radius: 3px;
  color: #666;
  font-size: 17px;
  padding: 8px;
}


/* Reduce the textarea size to 80 pixels */
textarea {
  height: 80px;
}


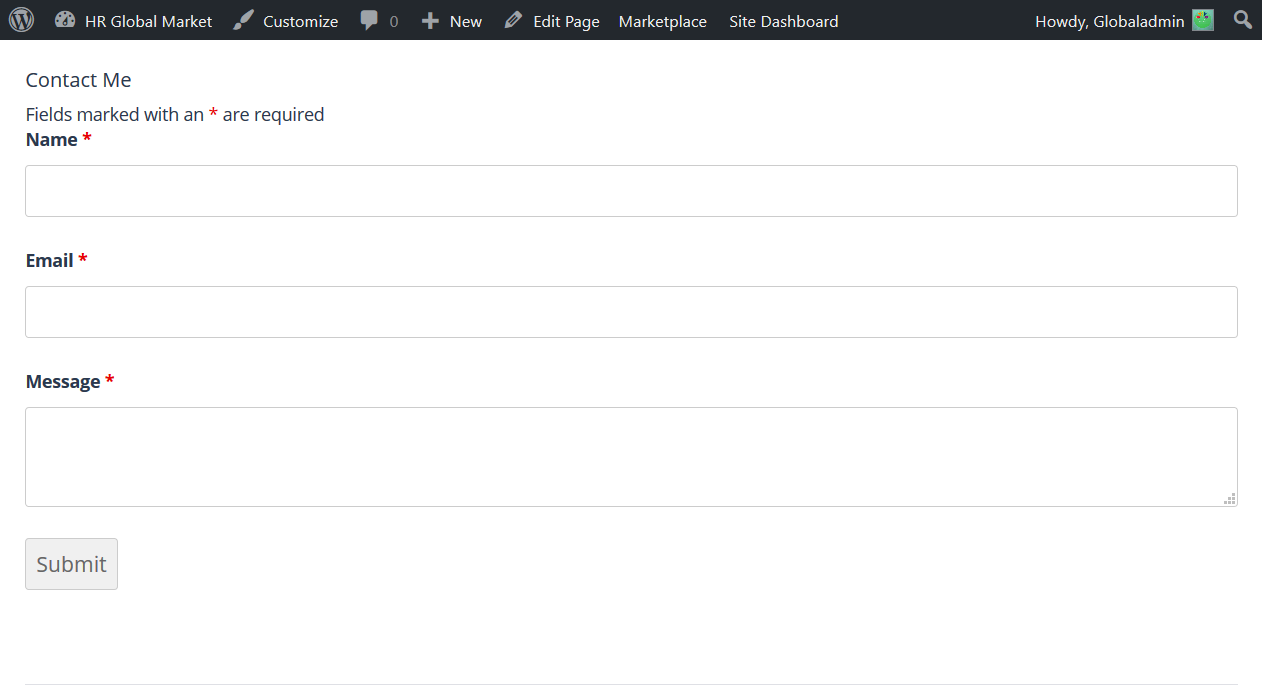
Contact Form - After Applying CSS

There you have it! A nice sleek modern looking form created by adding just a few lines of CSS.

Categories
Blog Wordpress

Two Simple Tips to Securing Your WordPress Site

1. Never use the default ‘admin’ as your administrator login username. As it is the default, unauthorized parties trying to wrongfully access your site will attempt using ‘admin’ to log in. Changing the username to something, anything other than ‘admin’ will prevent malicious attacks.

2. Add a Captcha Code. A Captcha (a backronym for “Completely Automated Public Turing test to tell Computers and Humans Apart”) is a type of challenge-response test used in computing to determine whether or not the user is human.

Usually, the Captcha test will take the form of a random set of characters shown on an image which the user has to type in an accompanying input box. Other cool captcha tests will ask the user to sum two numbers or click a checkbox proving that they’re human. There are several types of captcha tests available to check for bots which may attempt to hack your site.

Recently, I’ve had the pleasure of using the Captcha Bank plugin for WordPress – its pretty impressive. It adapted seemlessly to a specially customized login page when other Captcha plugin wouldn’t. There are lots of various options for customizing the Captcha code.